Use the Client Offline with a Request File and License File
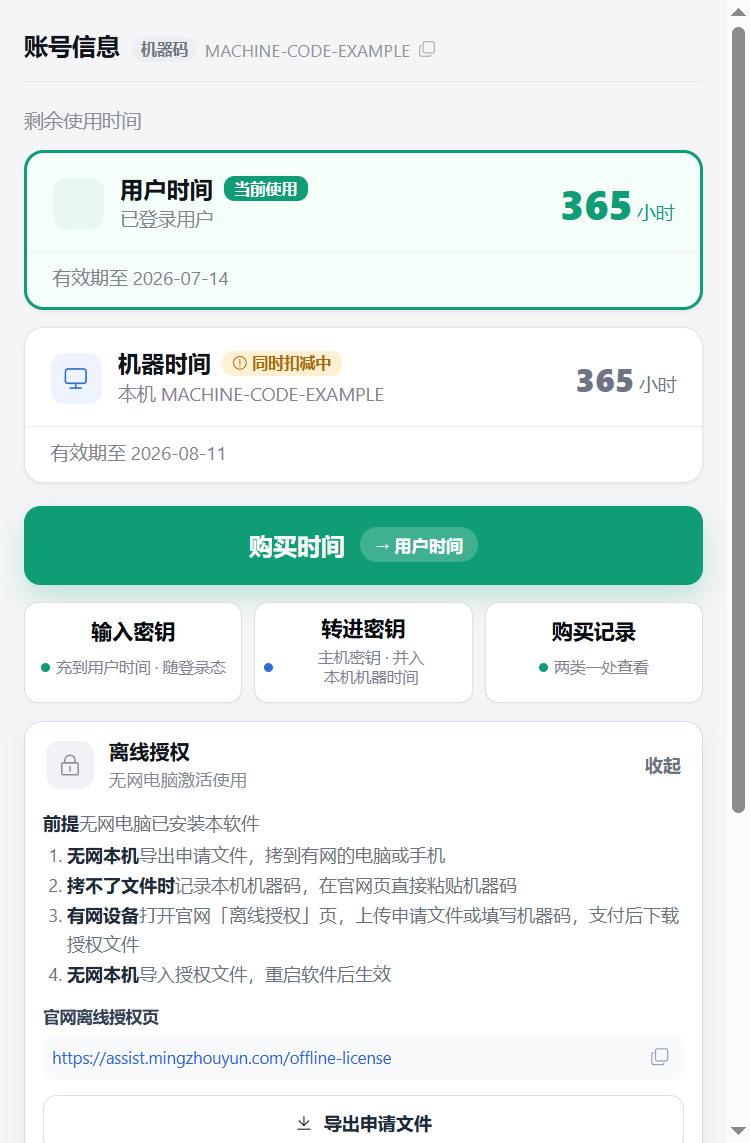
Export an offline request on the disconnected computer, purchase its license on a connected device, then import the license and restart.
Step-by-step desktop client guides for indexing, search, deduplication, collections, accounts, settings, and system menus.

Export an offline request on the disconnected computer, purchase its license on a connected device, then import the license and restart.
Distinguish a page reload from a stopped service, restart when instructed, check interrupted tasks and package logs for repeated failures.

Check machine and account time, choose the correct recharge destination, buy time or redeem a key, then reopen the search workspace.

Use the right image list drawer in search results, batch search, face albums, and collections to review a group of images and perform batch operations.

Understand desktop single-file dragging, browser preview dragging, and how to verify the delivered file.

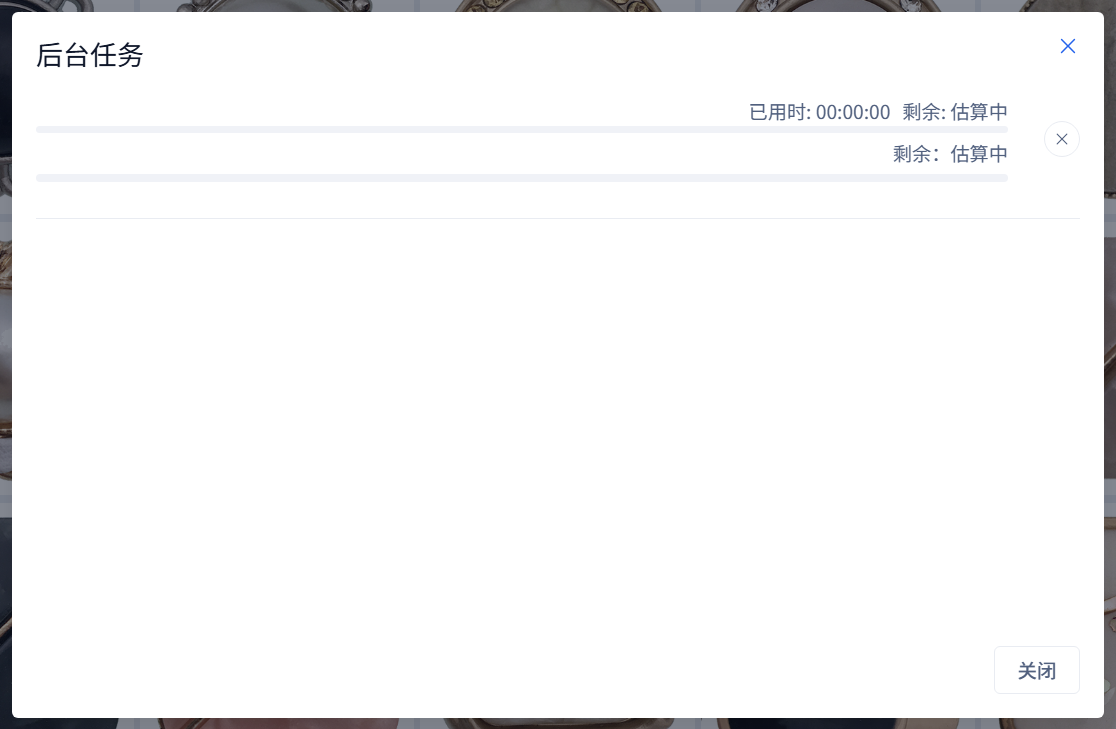
Use the top task area to watch progress, elapsed time, and dynamic remaining-time estimates; cancel a task only when cancellation is supported.

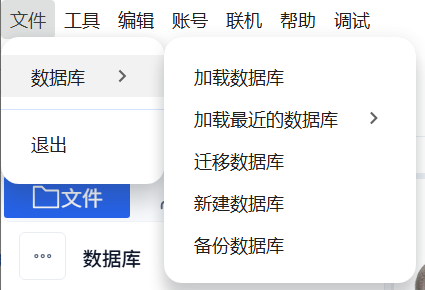
Use File → Database to load a database, switch to a recent database, migrate, create, or back up a local database.

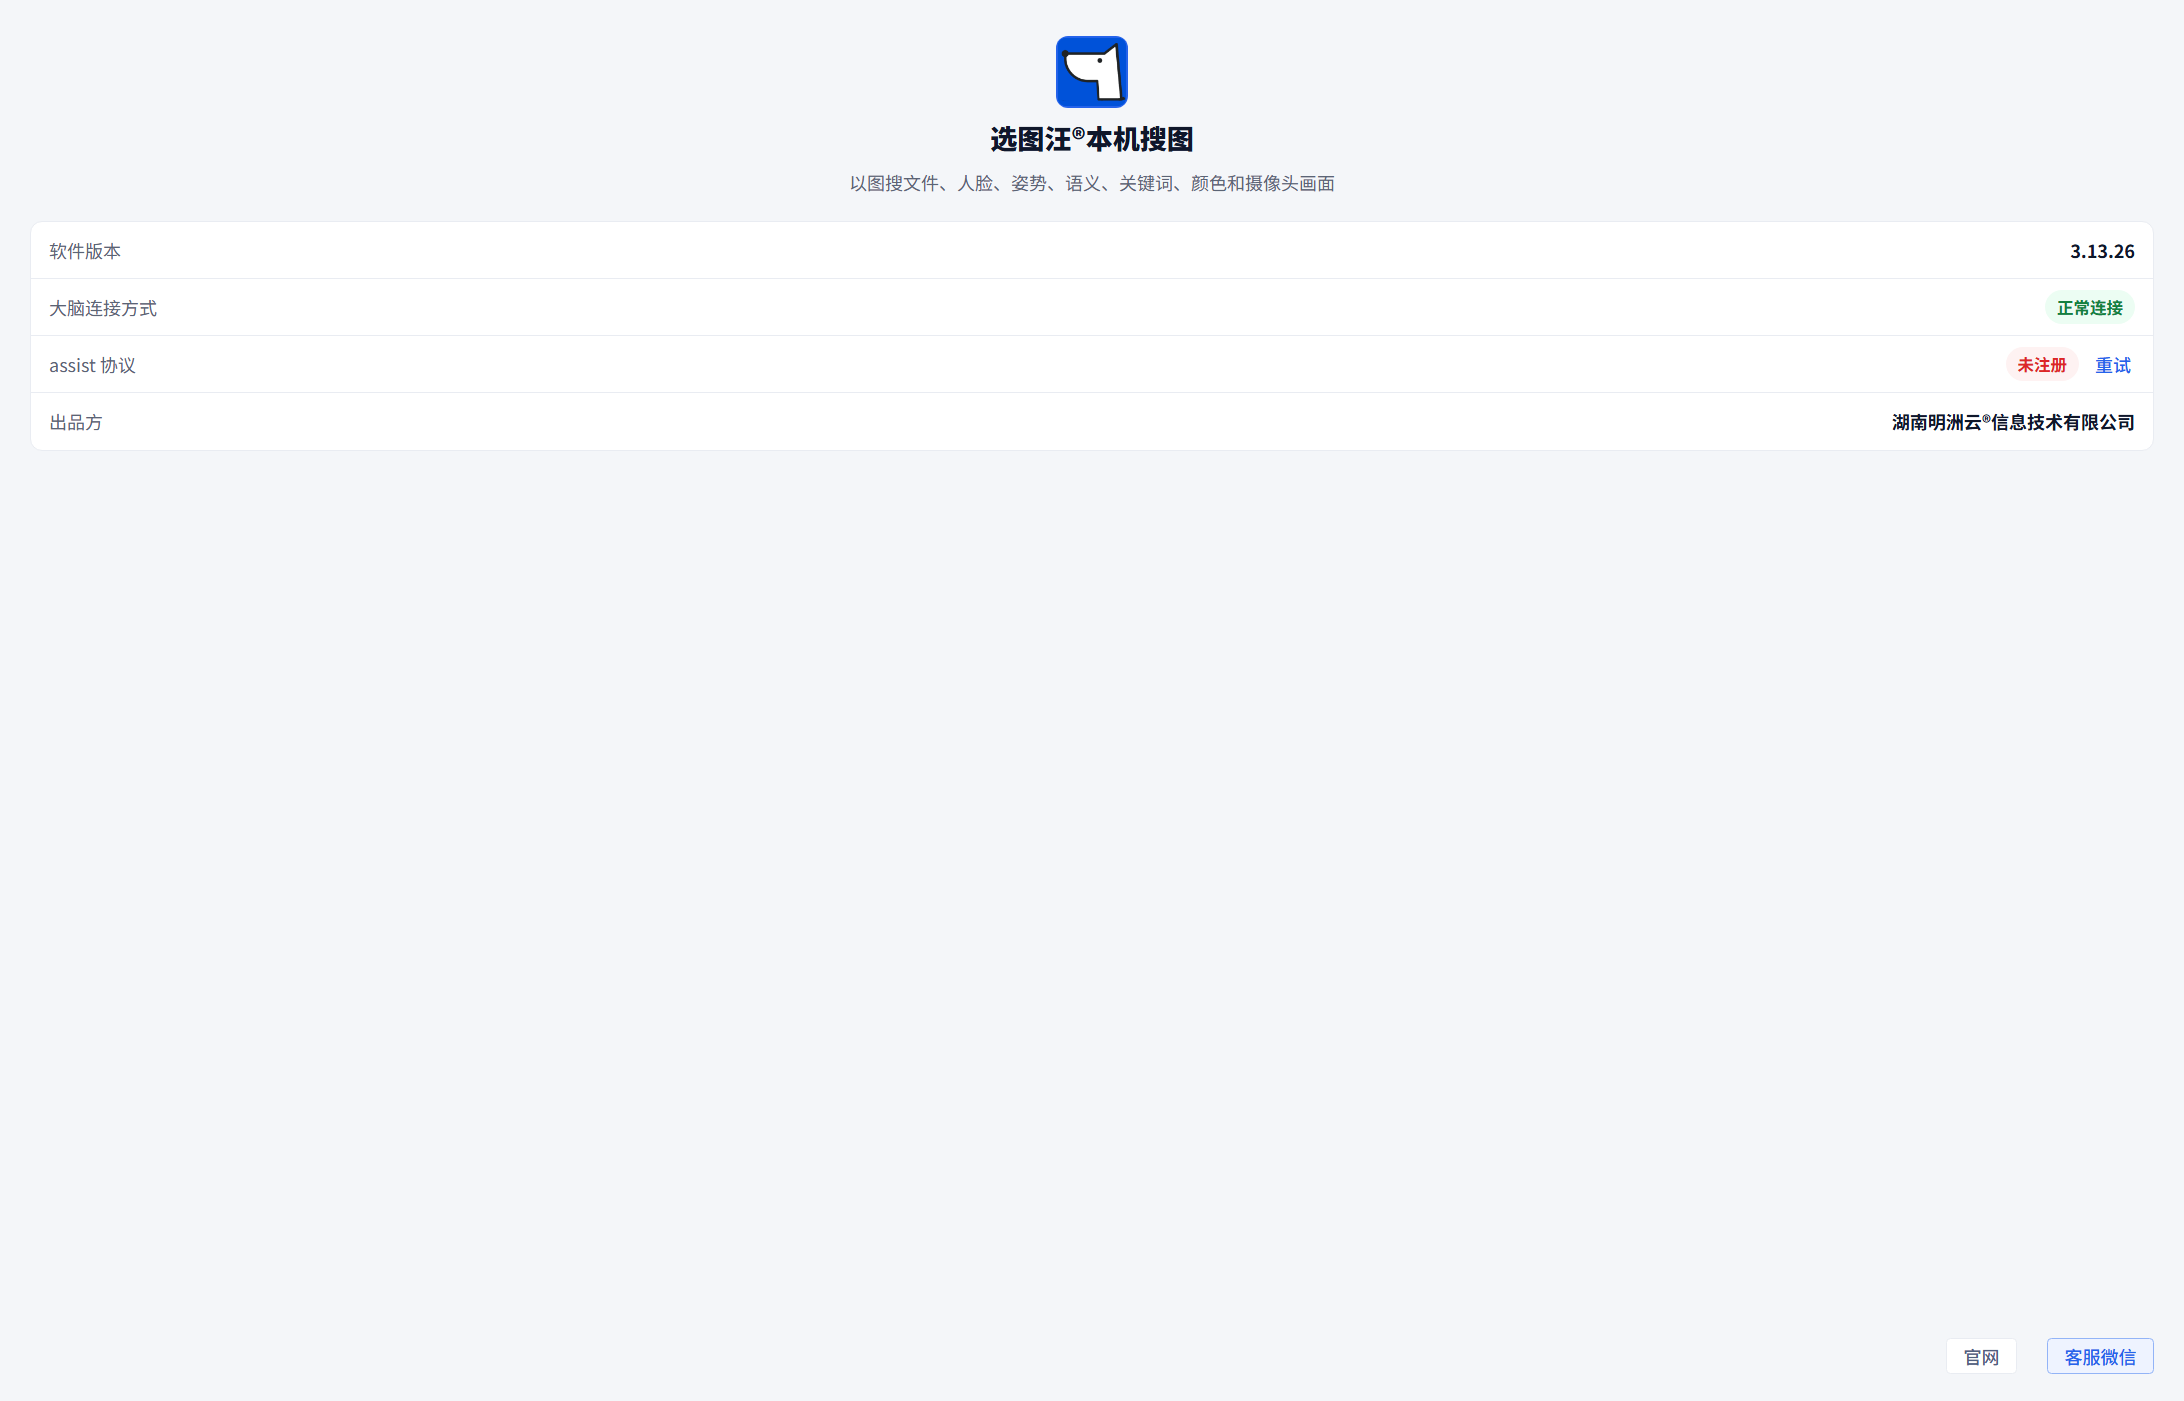
Use the About page to check the app version, local brain connection, assist protocol status, publisher, website, and support contact.

Adjust large-image thresholds and tile sizes, including restart and reprocessing requirements.

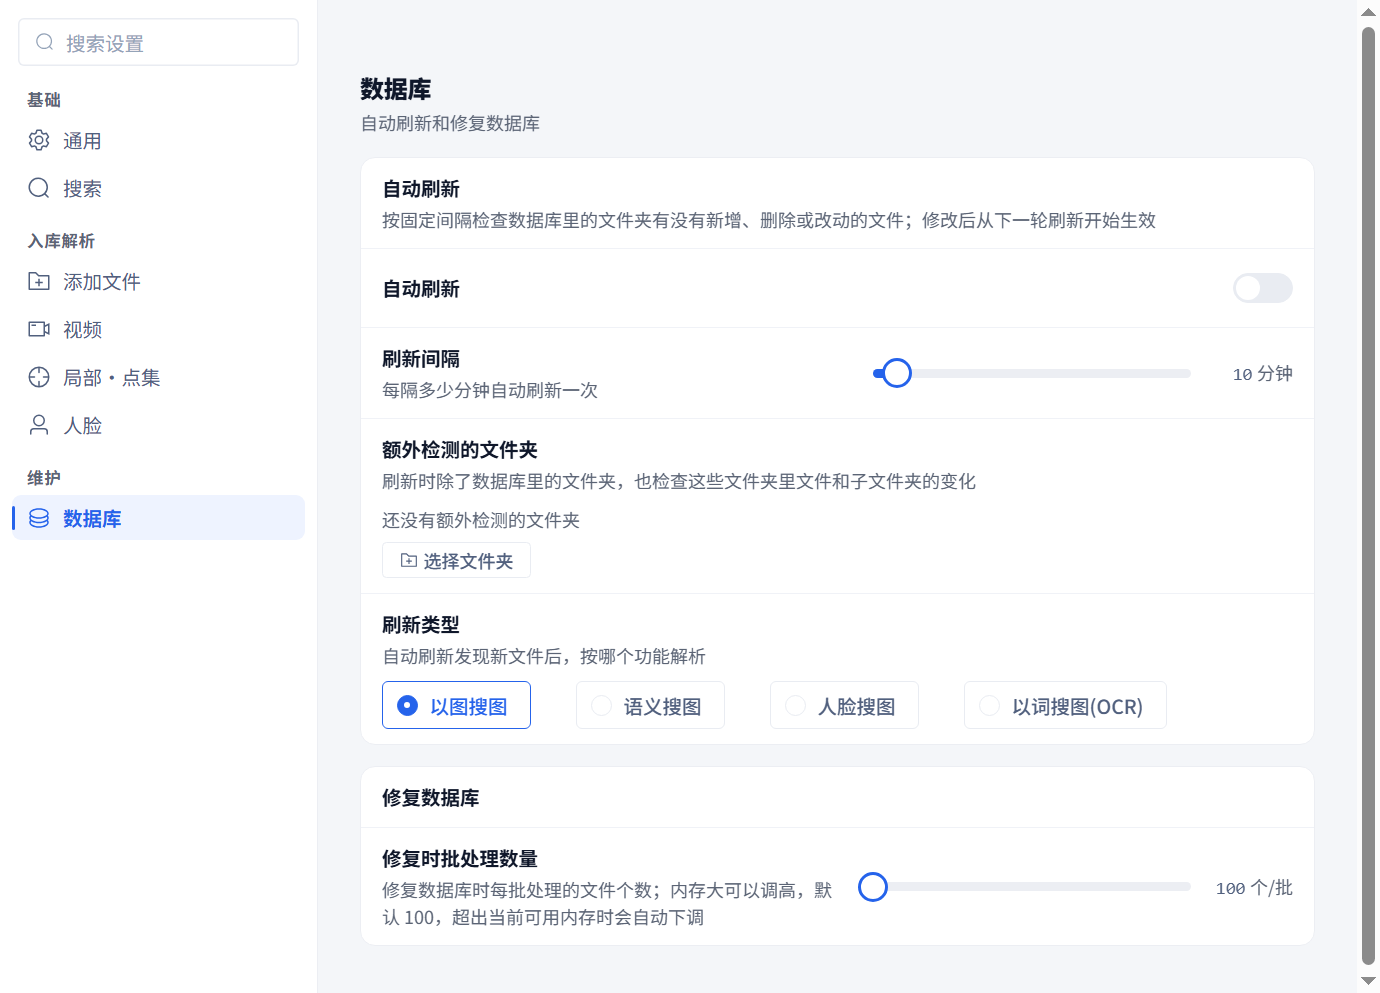
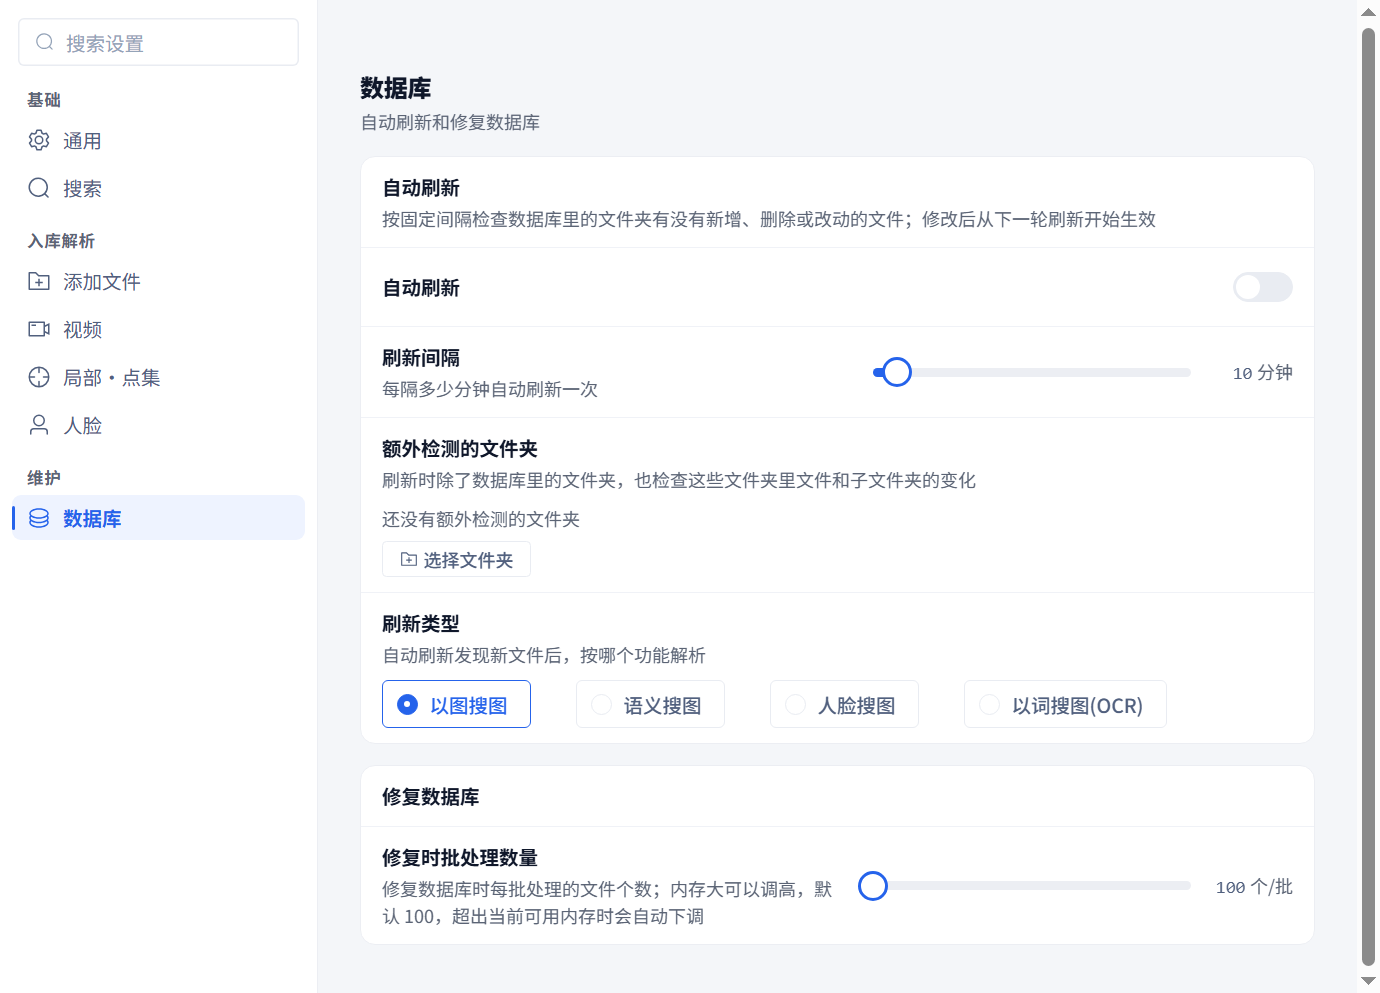
Set automatic refresh intervals, extra folders and the parsing type for newly detected files.

Adjust repair batch size in Database settings; changing this option does not start a repair.

Configure red-highlighted words for spreadsheet image information in General settings.

Set the default result count, image strategy and paste-search mode, and distinguish keypoint extraction from search behavior.

Choose import strategies, duplicate data, batch size and file types, and find the separate video and keypoint pages.

Reset the remote connection link when it was shared with the wrong person, exposed, or needs rotation.

View client member status, current device, and last login time, then disable, enable, reset password, or delete members as needed.

Use a client seat key on the host to add seats, then create member accounts for client devices to sign in.

Copy the intranet or remote connection entry from the host, or scan the QR code on a phone, then sign in with a host-created member account.

Bind a WeChat account from the account page so login, purchase, and account-related services can identify the user.

Use the account page purchase entry to buy time for the current machine or user account, then confirm the purchased entitlement after payment.

Enter a license key on the account page to add time or activate the correct account or machine entitlement.

Open the account page to check machine and user time, machine code, time history, online status, account binding, and Offline License actions.

Use the camera page to capture still images when you need a record, a reference image, or a saved frame for later review.

During camera search, review live frames, face boxes, matched people, and hit records so you can confirm results in real time.

Adjust live camera search options such as search scope, interval, and result behavior for real-time face search scenarios.

Select one or more USB cameras for live preview and face search.

After a batch search finishes, review each reference row, inspect the matched candidates, expand more results when needed, and export the final matches.

Use batch search to search many reference images at once, choosing image or face search type, strategy, scope, and result options.
Use the Help menu to check for updates and let the app download and apply available update packages.
Package app logs when search, face recognition, pose search, OCR, background removal, startup, or other tasks fail, so support can diagnose the issue.

Open the built-in 20-chapter guide for indexing, search methods, filtering, organization, export, and connected devices.

Rename, delete, browse, and export collections so a project shortlist can become a clean delivery package.

Create collections in the left sidebar and click a collection to view its images, making it easier to organize material by project, theme, or delivery batch.

Review duplicate image groups, choose which items to keep, and distinguish between removing database records and deleting source files.

Add useful search results into a collection so candidates from multiple searches can be reviewed, filtered, managed, and exported together.

Export search results as images, filenames, image paths, renamed files, or spreadsheet records for delivery and review.

Use the left Results tab to review previous image, semantic, face, color, pose, and face-filter searches, and clear a category of history when needed.

In reverse image search, pose search, semantic search, and face search, set the search scope and maximum number of results to make results more focused and controlled.

Drag an image into the search workspace or paste an image from the clipboard to start a quick search. Pasting uses image or face search according to your settings.

Upload or paste an image containing a face, select the target face after detection, and find the same person or similar faces in the library.

Describe image content in natural language and use semantic vectors to find matching material, with optional scope and result-count settings.

Before reverse image search, crop the reference image, remove its background, or clear it and choose another image so the search focuses on the real target.

In the reverse image search dialog, choose the global color strategy, extract dominant colors from the reference image, and find images with similar palettes.

Search with an uploaded image, dragged image, pasted screenshot, or existing indexed item, then choose a strategy and scope to find visually similar, subject-similar, or color-similar images.

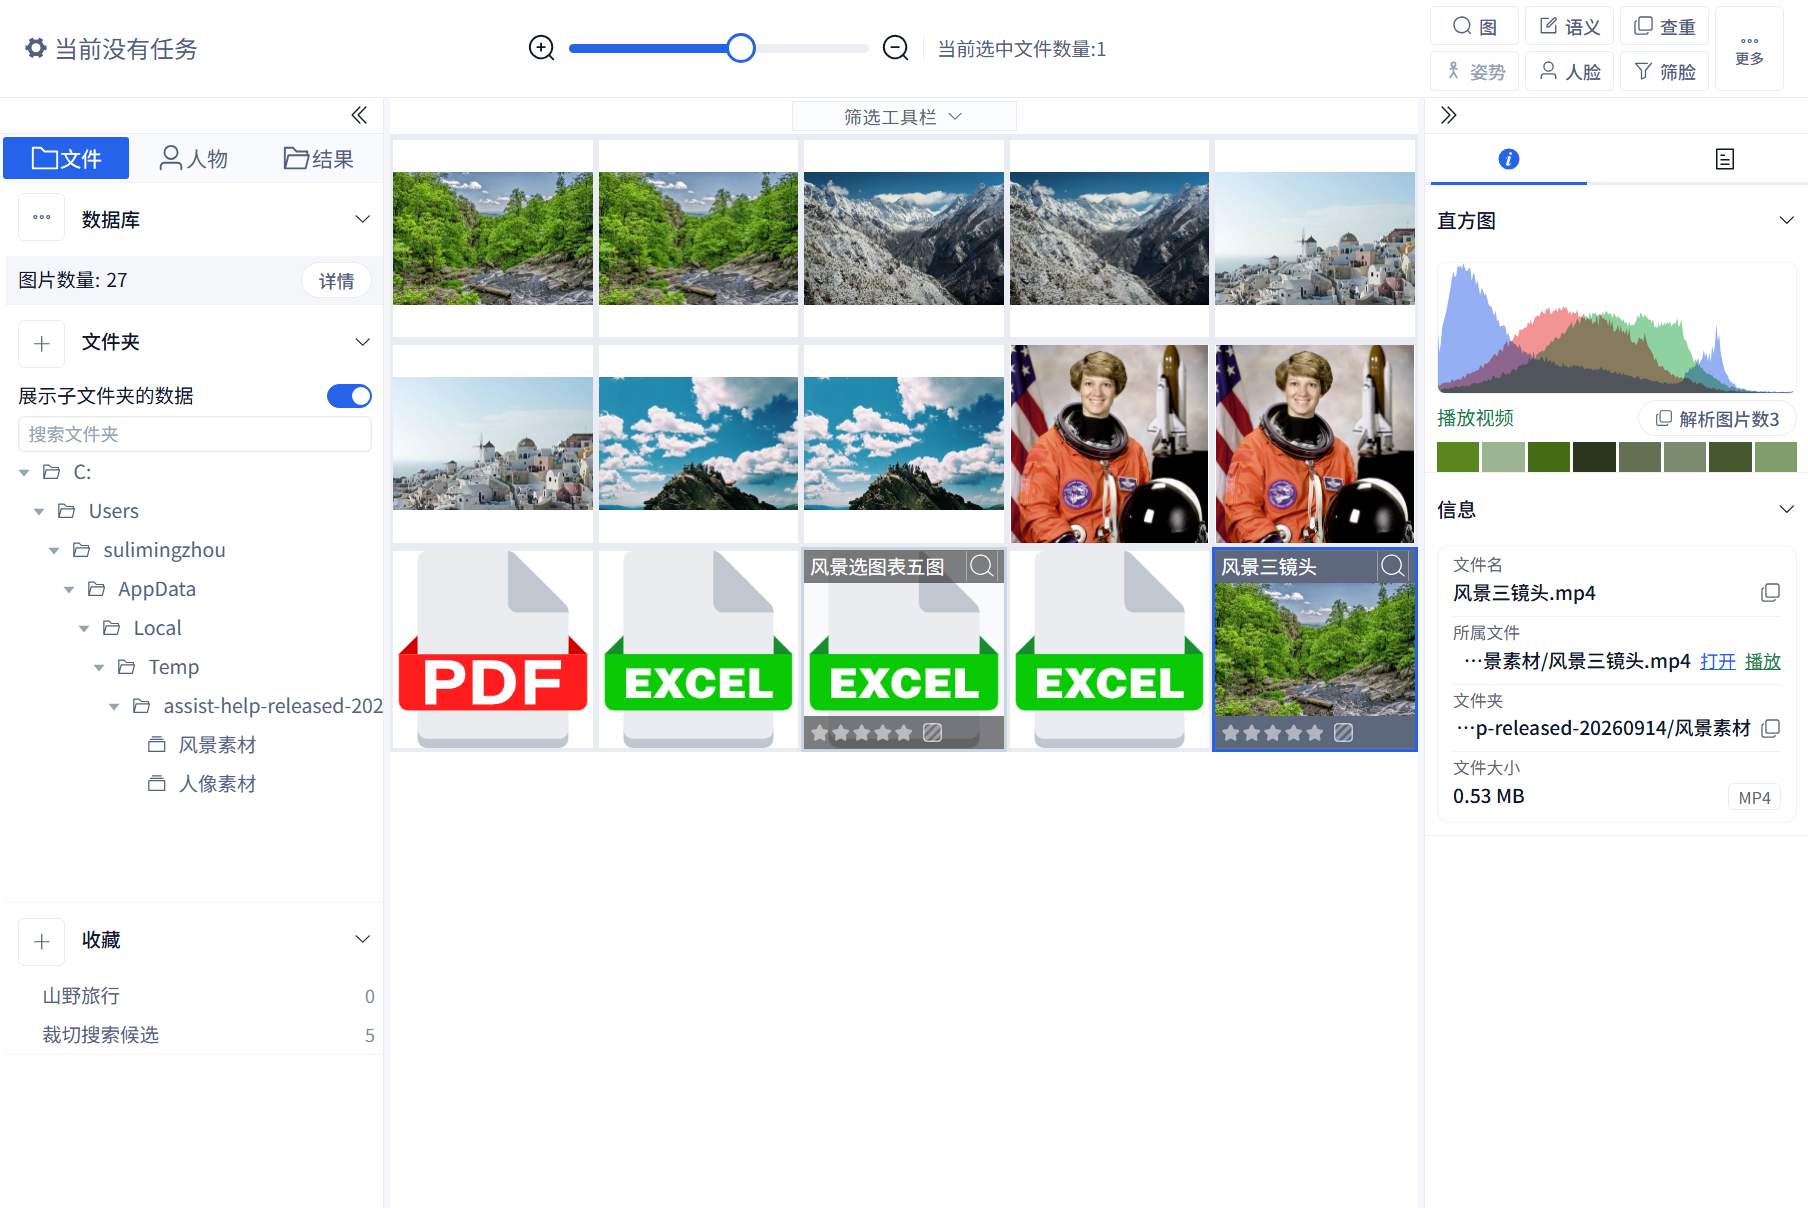
For Excel, PDF, video, and other splittable files, the right detail panel shows extracted image counts and lets you view the child images extracted by the app.

Right-click a material item in the file list to locate it, open the original file, rename it, remove or delete it, copy the filename or path, re-parse it, set ratings or color labels, and save a copy.

Re-parse one file when its contents at the original path changed or its analysis needs updating. Restore access or sync folders first if it was moved or renamed.

Add descriptions, usage notes, client names, or organization status to a single image in the right detail panel, then search notes later from the filter toolbar.

Select a file and use the right detail panel to view its histogram, file information, generated search data, EXIF data, video information, and other metadata.

Before removing or deleting selected material, confirm the target range. Removing from the app clears database records; deleting from the device moves source files to the system recycle bin.

After setting filters, use the export button in the filter toolbar to copy the current filtered results into a new folder for delivery, backup, or project use.

Use the zoom slider above the file list to change how many thumbnails appear per row, switching between larger previews and denser browsing.

Right-click an indexed folder in the folder tree to open its original location, move the folder, refresh a single folder, or remove that folder's data from the app.

Use the File tab in the search workspace to browse indexed material, search folder names, and choose whether to include subfolder data.

When a damaged database.db prevents startup, database switching, or initialization, manually choose the database.db file from the Tools menu and try to recover data.

Rebuild search indexes when results are abnormal, counts do not match, or existing images need regenerated image, pose, semantic, face, or other features.

When files in indexed folders are added, deleted, renamed, or changed, refresh the database to sync the file list and search data.

Check indexed files, images, search data and disk space; open the database location or reclaim unused space inside database.db.

Open the desktop client, click "Go Search", wait for the local service to connect, and enter the main image search workspace.

Enable duplicate hashing and prepare older imports before reviewing duplicate groups.

Manage the WPS download reminder without confusing it with installing the required software.

Use General settings to change appearance and language, keep the display awake during long tasks, and find options with settings search.

Export photos grouped by face album so portrait or event photo sets can be delivered, archived, or reviewed by person.

Use the face album to browse people detected in the image library, open a person group, and review photos belonging to the same person.

After duplicate detection is enabled and data is prepared, search for duplicate or near-duplicate image groups in the database, a folder, or a collection.

Set star ratings and color labels for one or more items from thumbnails, full-screen preview, or the file context menu, then use them for later filtering and organization.

Double-click a material item or press Space after selecting it to open full-screen preview, where you can view, zoom, rotate, switch images, and continue setting ratings or color labels.

Use the filter toolbar above the file list to narrow material by file type, rating, color label, size, ratio, duration, capture date, camera metadata, keywords, and sort order.

Choose material folders from your computer, add images, spreadsheets, PDFs, videos, and other files to the database, and generate the search data you need.

Before entering the workspace for the first time, confirm whether you need to parse Excel files. If you do, install or confirm the WPS environment as prompted.

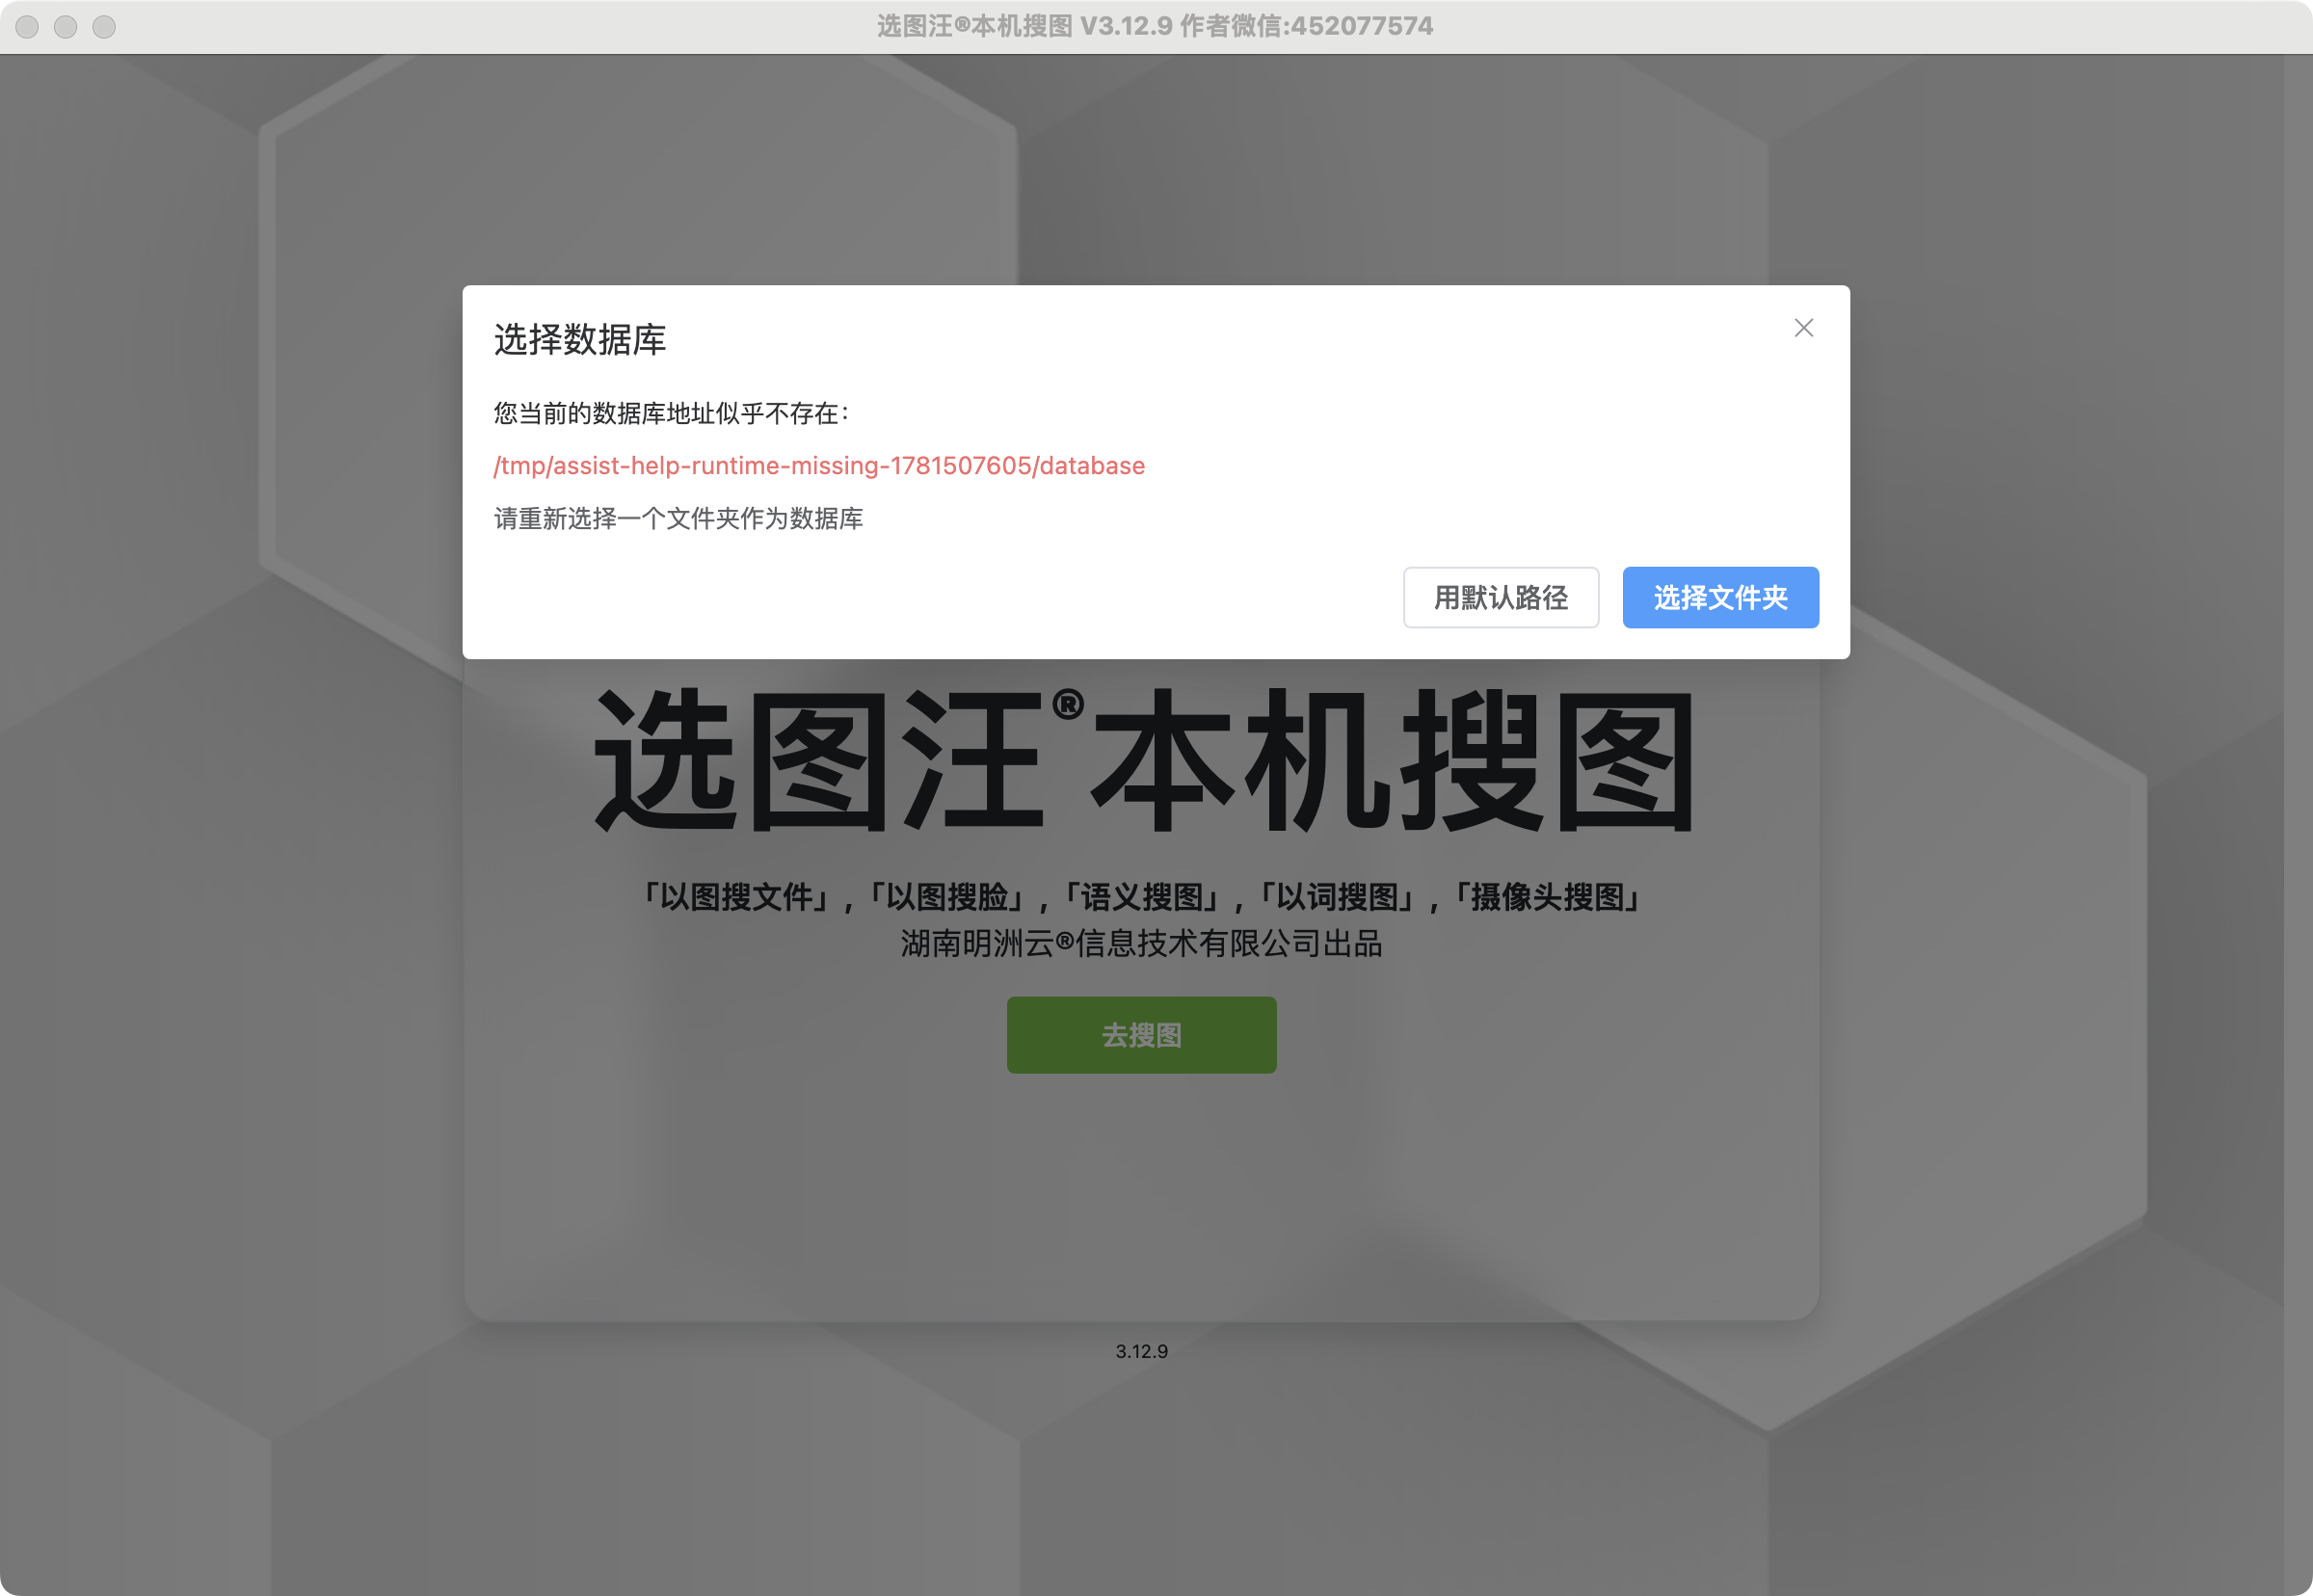
If the original database folder was moved, deleted, disconnected, or is otherwise unavailable, follow the prompt to choose a valid database storage location again.

Use Help -> Official Website to open the product website for product information, purchase entry, downloads, and online help.

Before removing images, distinguish between removing records from the app, deleting source files from the device, and removing items from a collection.